How to receive iMessage messages on Windows 11
Microsoft is doing something Apple doesn’t want to do by bringing iMessage to Windows. Learn how to receive iMessages on Windows 11.
One of the valuable features that we happily mentioned in the article Best and Most Useful Features of Windows 11 in 2023 was the addition of the ability to receive Apple iMessages on Windows 11.
Finally, after a long time and despite the closed Apple ecosystem, Microsoft decided to take a step forward and make Windows users who own an iPhone happier than before.
Microsoft has introduced Phone Link for iOS in the latest version of Windows 11. By installing Phone Link for iOS, which is in the testing phase, you can receive calls, texts, and important notifications from your iPhone on your desktop while working on your Windows 11 computer. Fortunately, Android users have been helping users for a long time, as they have had access to these and even more features for a long time.
Unfortunately, not everyone will have immediate access to this feature. The feature is gradually becoming available to Windows Insider users. Even if you follow all the steps below, you may find that you still cannot connect your iPhone to your computer, access your chat history, send or receive group messages, or view or send images and videos.
In this article, we will teach you how to sign up for the Insider program, find the essential iPhone app, pair two devices, and finally use your PC to send messages.
How to receive iMessages on Windows 11
The ability to receive iPhone messages on Windows is limited to some users. Microsoft has not announced a specific time to make this feature publicly available. In late February, the company announced that it was testing and collecting feedback from iPhone users who were part of the Insider program.
Since then, no announcement has been made about the timing or progress of the feature. Currently, if you want to access this feature, the best thing you can do is join the Preview Release channel through the Insider program. We will guide you fully below.
1. How to sign up for the Insider program
If you don’t mind occasionally circling with your Windows 11 computer bugs, you can sign up for the Windows Insider program to install the future beta version of Windows. To register, you need to:
- Go to Windows Update in your computer’s Settings.
- If necessary, sign in to your Microsoft account by clicking the Link an account button.
- After doing so, select one of the preview channels: Dev Beta, or Release Preview. Let’s take a look at each channel:
1. The Dev channel is more for developers who deal with debugging and bug fixes. Dev has the least stability of the three channels.
2. The Beta channel is slightly more polished than the Dev channel, but choosing it will still expose you to potential problems and bugs.
3. The Release Preview channel is the most stable of the three channels. So if you’re only doing this for early access to the Phone Link program on your iPhone, you should join the Release Preview channel.
- Once you’ve selected a Preview channel, you’ll have an update to Windows with the related build available. Go to Settings and Windows Update to download and install the update.
- After each restart for installation and update, return to the Windows Update page and check for further updates until there are none remaining.
2. Install and launch the Phone Link app for iOS
For Microsoft to be able to work its magic and display your iMessage conversations on your PC, you’ll need to:
- Install Link to Windows on your iPhone.
- Download it from the app store and sign in with the same Microsoft account you use on your PC.
Make sure the Phone Link app on your PC is up to date. To do this:
- Open the Microsoft Store app.
- Go to Library and then Get updates. Whenever updates are available to install, click Update all.

3. Connect iPhone to computer
After updating the computer and necessary software, you can connect your iPhone to the system and use iMessage.
- Open the Phone Link program on your computer and the Link to Windows app on your iPhone.
- The Phone Link app will have two options for your phone: Android or iPhone. Choose iPhone. (If iPhone is shown as ‘coming soon’, your account does not yet have access to this preview. Check the app once a day to see if you have access or not.)
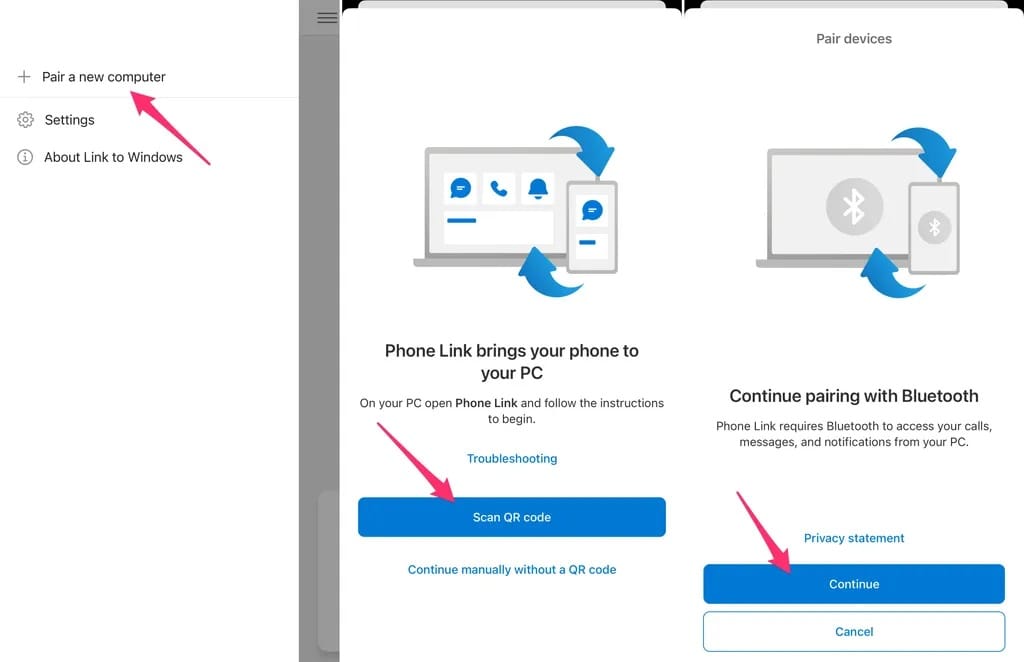
- In the Link to Windows app on your iPhone, swipe the menu out from the left side of the screen and select ‘Pair a new computer’ at the top of the page.
- Use your iPhone camera to scan the QR code shown in the Phone Link app on your computer. Follow the instructions displayed on your iPhone and computer to use Bluetooth to pair the two devices.
- After pairing is complete, open the Settings application on the iPhone and selectBluetooth .
- Find your computer name in the list of connected devices. Tap on the âiâ icon and then turn on Show notifications .
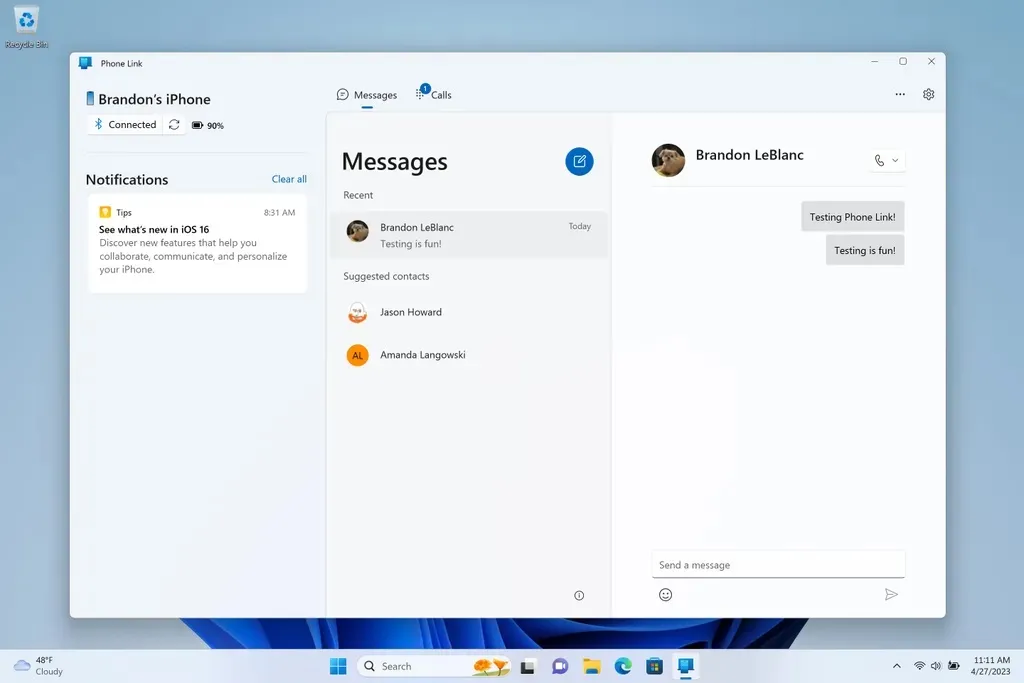
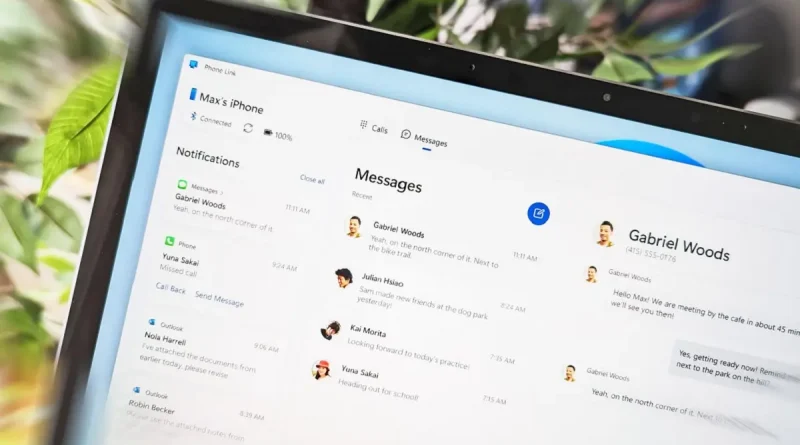
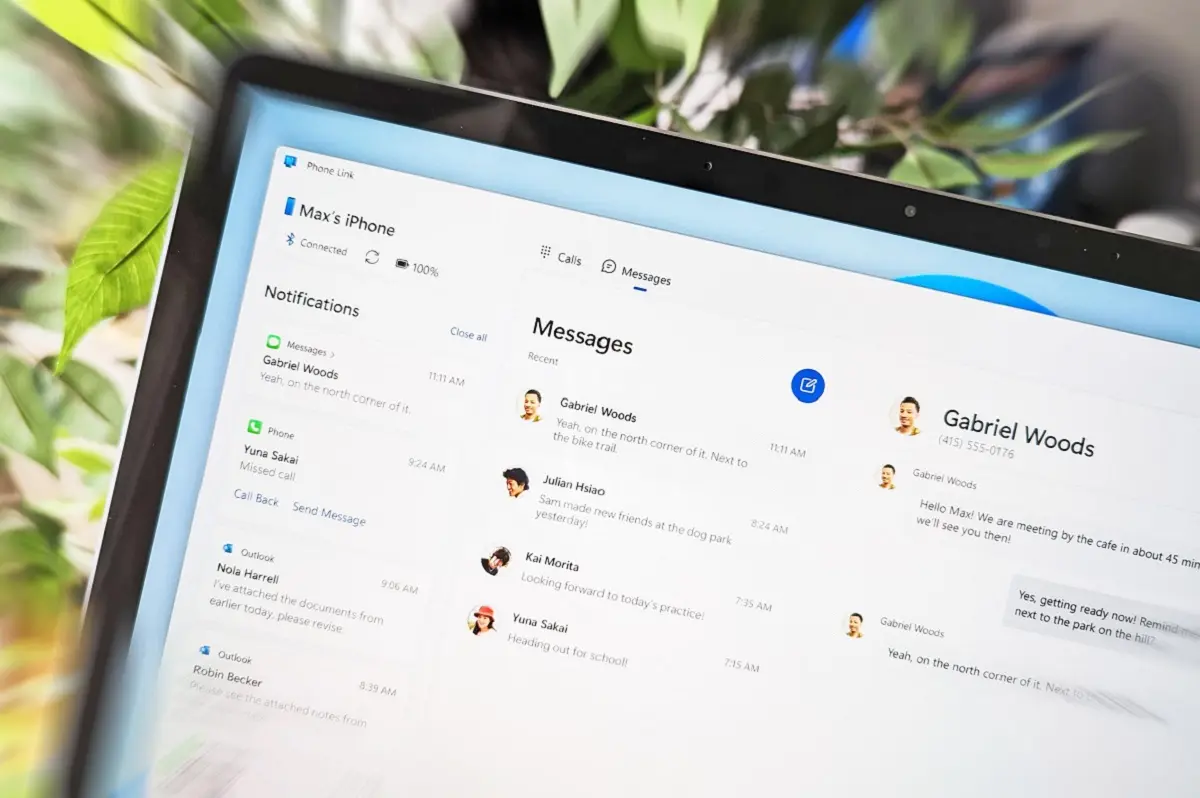
4. Receive iPhone messages on your computer
After completing all of these settings, you can open the Phone Link app on your personal computer. The app will connect to your iPhone via Bluetooth and start receiving notifications of new messages.
Note that in the current update, you cannot see old calls and messages. This feature is only able to display messages and notifications that you have received or sent while the app was open and the two systems were connected. Also, to send or receive images and group messages, you still need to rely on your iPhone.
Outside of these limitations, you can now send or receive text messages and iMessages directly from your personal computer, something that was not previously possible.